Jane Cleland-Huang Drone Class 02/18
Controling a Pixhwak with a Pi3
Steps:
- Add 5V usb supply
- Attach dupont connectors to serial cable
- Test powering up and loging in to the Pi
- Configure the Pixhawk Serial Port
- Connect Pi to Pixhawk
Step1: Add 5V usb supply
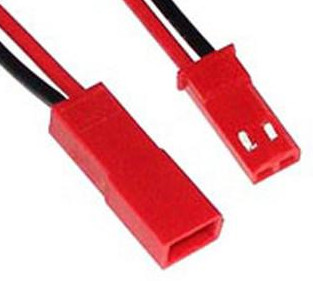
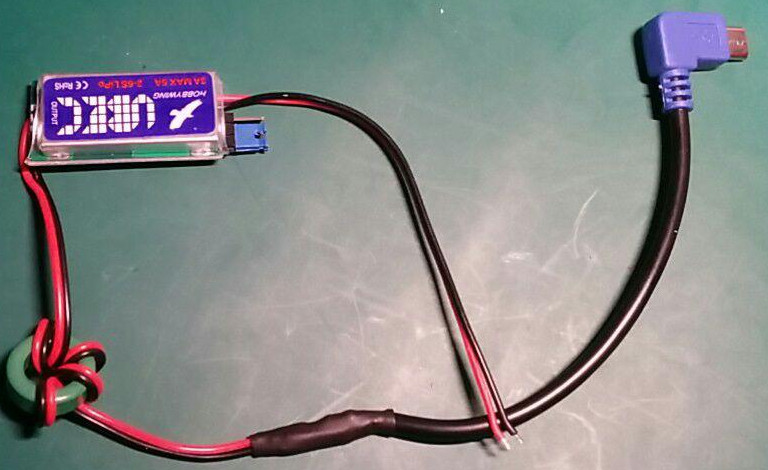
Use the crimp tool to attach the JST connector to open UBEC input leads making sure to have the correct orientation for the 12V supply coming out ofthe base of the Iris (red to red and black to black)
Step2: Add Dupont connector to serial cable
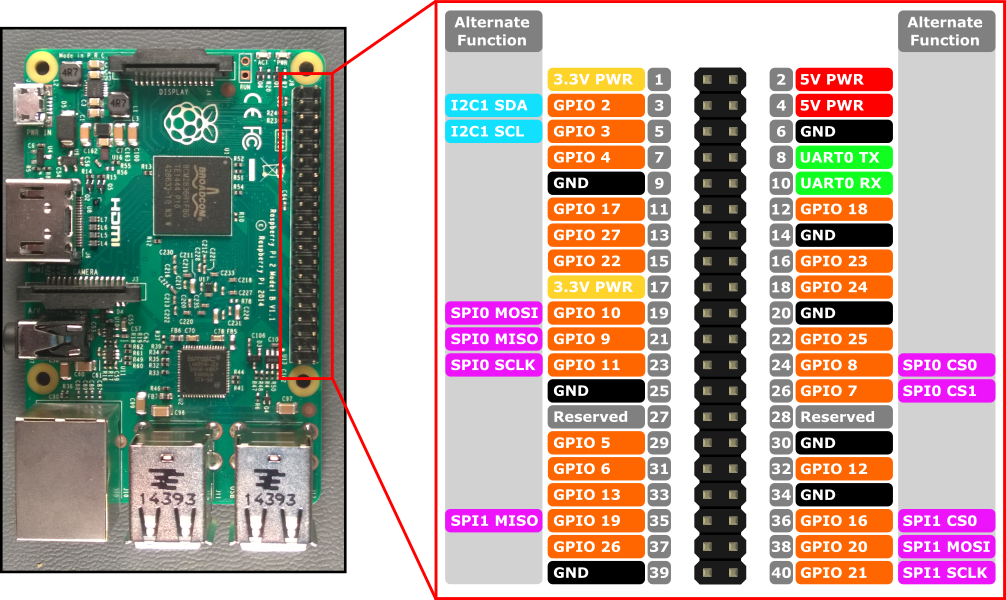
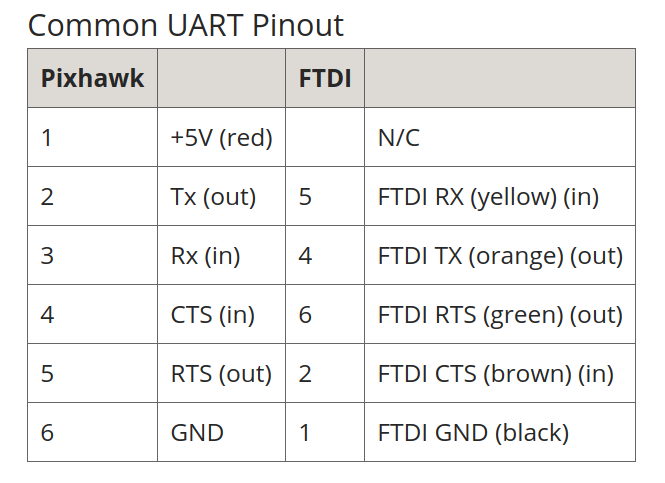
Again strip and crimp the connector to the open end of the cable taking care to get the pin order correct
Reference:
- Grey/White/Black/Brown cable: Vcc/Tx/Rx/GND on Pixhawk
- Red/Orange/Yellow/Green cable: Vcc/Tx/Rx/GND on Pixhawk
Note: Tx on pixhawk goes to Rx on Pi
Step3: Power up and connect to the Pi
i] Insert microSDCard into Pi3 (noting the number on it/the box)
ii] Connect UBEC to JST connector underneath Iris and the microUSB end to the Pi3
iii] Connect the Iris battery to power up the Pi
iv] Connect your computer to the local WLAN: * SSID: NDSUAS * PSWD: NotreDame
v] ssh in
ssh pi@Pi<number>.local
* User: Pi
* PSWD: NotreDame
vi] Shutdown the Pi
$ sudo shutdown -h now
Step4: Configure the Pixhawk Serial Port
i] Install QGroundcontrol on a local machine
ii] Connect a USB cable between the microusb port on the side of the Iris to a local machine
iii] QGC should connect to the Iris automatically
iv] Click on the gears symbol and go to the bottom where the parameters option is
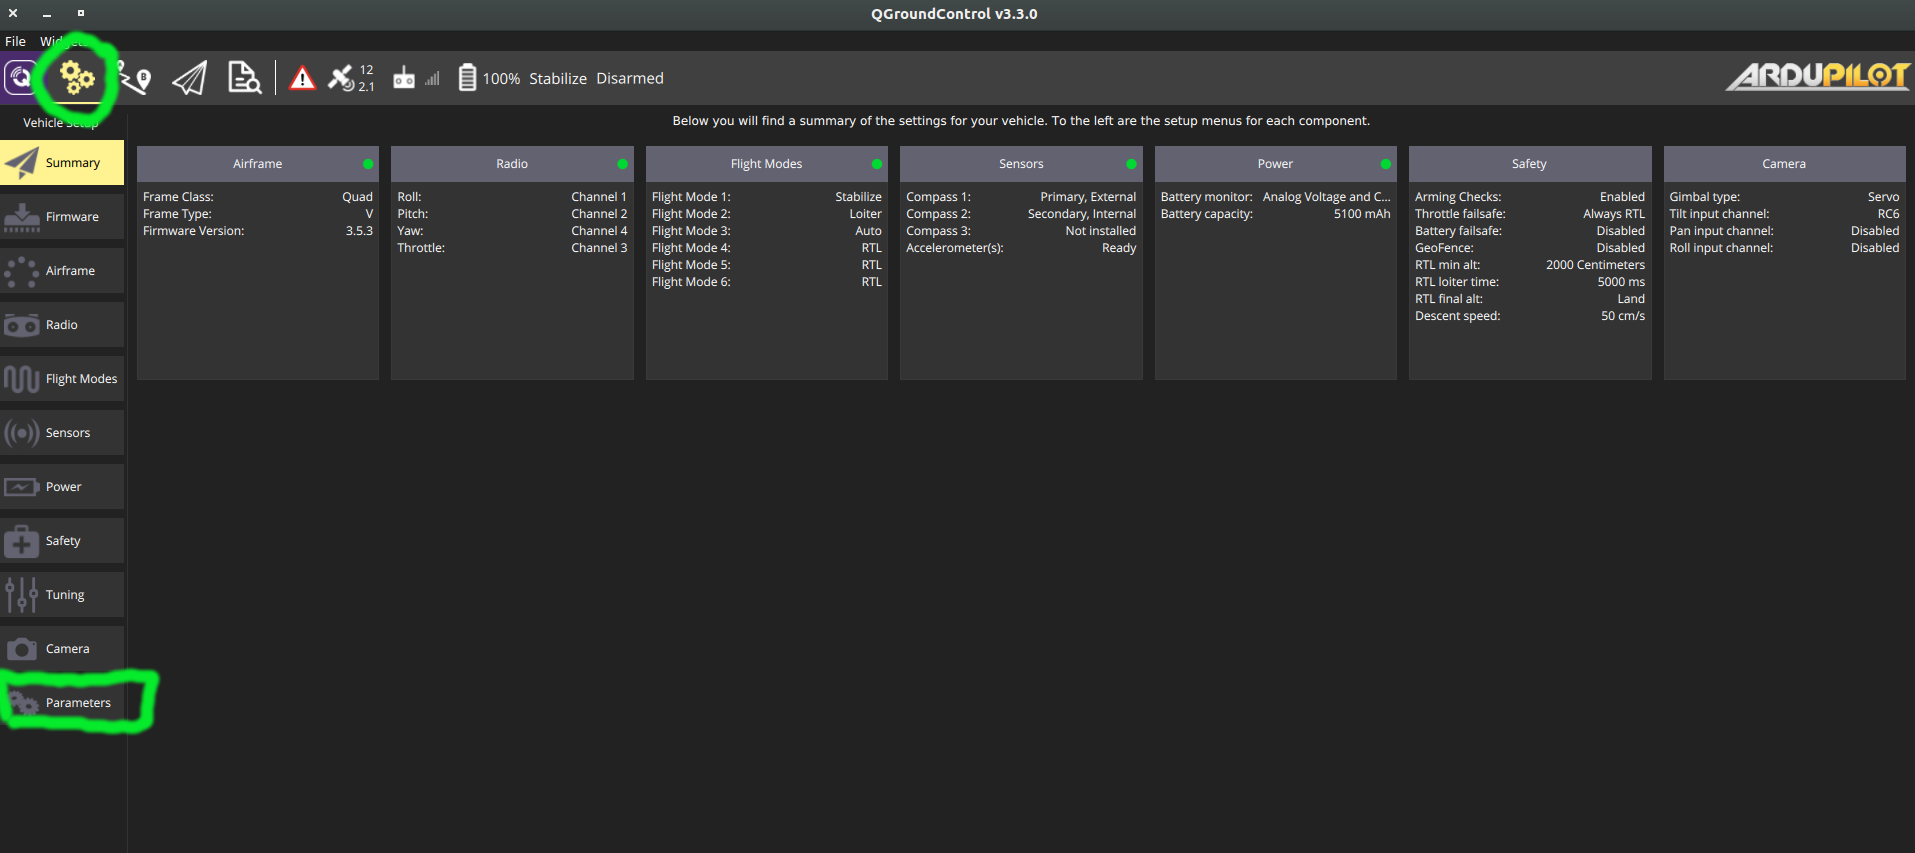
v] Under parameters, search for:
- “SERIAL4_PROTOCOL” and set it to Mavlink2
- “SERIAL4_BAUD” and set it to 57600
vi] Unplug the Iris
Step5: Connect Pi to Pixhawk
i] Unscrew the top of the Iris
ii] Insert DF13 connect (serial cable) into “Serial 4/5” port
iii] Connect Dupont connect to Pi3 Serial port header
iv] ssh into pi and run:
$ mavproxy.py --master=/dev/ttyS0 --baudrate 57600 --aircraft MyCopter
If it fails to connect go back and check all connections and the setting changes you made
v] Once successfully connected you should see:
>> MAV //Tab to see command options
vi] Connect to QGC again via the external USB cable and monitor settings as you change them via the ssh and the Pi.
Eg: Change flight modes as follows. This will change to auto flight mode if not already in it (See documentation here on available flightmodes. Not all flightmodes are available on all platforms.)
>> MAV mode auto
Play around with options. See Mavproxy docs here
v] Close Mavproxy and now try interacting with the Pixhawk via a python script. Start with the test connection script available in ~/Desktop/
Close the mavproxy session 1st.
$ python -i testconnection.py
Once connected close the session, you will come back to scripting just now.
Step6: Flight logs:
The pixhawk creats 2 types of log files, dataflash (.bin) and telemetry logs (.tlogs). Both are in a binary format requiring an ingestor to interperate them. (see the docs for more details)
When you ran mavproxy.py a t.log file was created
Check for the log at: MyCopter/logs/
You can either examine this log file in a number of ways:
Mission Planner on Windows
MissionPlanner is another ground control software tool that has good tools for review and exporting the logs to ASCII formats. Instructions for exploring a log file can be found here. You can either download the flight log from the Iris manually or if you plug the usb cable directly back into the Iris you can download it via Mission planner. (A 3rd option is to connect to the Iris using the telemetry radio but generally log files are too large for this to be efficient).
Alternative to Mission Planner and better for report writing: MAVExplorer.py
If you do not wish to run Mission Planner in Windows, or wish to create plots for reports/later reference etc MAVExplorer is very useful.
If you wish to install MAVExplorer on your own local machine, follow the instructions here. Or, MAVExplorer, it is already installed on the Pi, you will just need to forward X over shh as it’s a GUI application.
Whichever avenue you take, once installed:
$ MAVExplorer.py <*.tlog/*.bin>
Tab to see available commands eg:
MAV> map
MAV> graph MODE.Mode ATT.DesPitch POS.Alt
7. Exercise
-
Write a python script that first checks and then changes one of the failsafe settings on the Pixhawk.
-
Explore more examples at DroneKit – Note: Dronekit repo is already downloaded to the Pi under ~/Desktop/
8. Extension exercise (optional)
- Install nginx on the Pi and serve parameters (eg pitch/roll/yaw/baromter/GPS/etc) from a webpage for remote monitoring over wifi